Musings #3: 3D character creation
Unexpectedly, the third devlog post is about building a 3D character. I thought I'd face more difficulties while programming, but turns out that art has it's own complexities. Here's a link to the previous visual art post. There are also many paragraphs, so I'll distinguish the main learning points.
The post is not about concept art, which is likely what comes to mind when character design is mentioned. I've decided to adapt the concepts to my goals while I implement the original concepts, to have an incremental development process. Instead, I wrote a lot about 3D character modelling and animation.
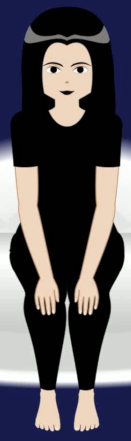
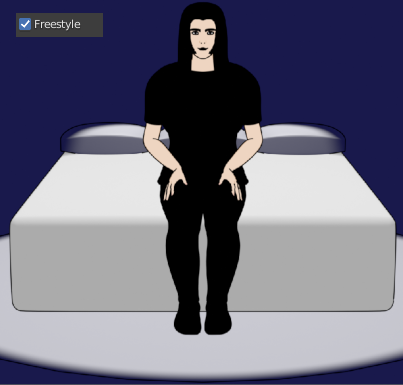
Some context: the previous detailed scene is a 2D vector animation in Synfig, and I'm currently turning it into a true 3D animation in Blender.
Translating 2D to 3D made me affirm that I should keep designing the 2D World in 2D software; 3D is more complex not only in shape, but in colors, you have more vertices to work with, and you will be forced to deal with things you don't have to manage with 2D if you don't need them, like normals or cameras. Therefore, 3D design is not only more complex, but also has extra steps, and the technicalities of the transition from 2D to 3D could easily fill a post. The upside: once everything is setup animations will be easier, since you don't have to handle shading directly or create new shapes when you change angles.

At this point , there's still a chance of going back to 2D animations, but I feel I need a bit more experience with both 2D and 3D before making a final choice.
I'll now describe the parts that were interesting, and how I dealt with them.
Anatomical baseline
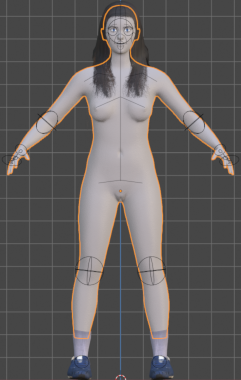
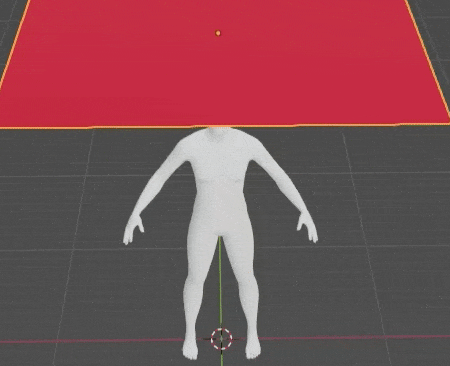
To get a baseline 3D model I decided to try MakeHuman Community, which creates a 3D humanoid mesh according to input variables. The focus on realism overcomplicates it, due to things like input variables being unitless statistical averages instead of commonly used SI units or giving the choice to move the eyesocket vertical size at the inner, middle and outer portion, while the eyeball has an independent size value, but being a volunteer project aiming at a difficult task means it also falls short of being realistic in many ways. I have dealt with detailed anatomy before, so I kept using the software instead of looking for alternatives.

What I did is keeping track of any values that I would want to change for all models, and value changes of specific models. This felt overkill while I did it, but afterwards I'm glad I did; I had to adjust and remake the model multiple times because I found I wanted to change a couple things that affected how the other values are interpreted. Of course, I also saved the file with the model's changes, but having a separate ordered record of 30 and something changes instead of checking hundreds of values to see if they were different in the save file saved time.
I noticed that many values, while statistically average, where not at all like it's depicted in the media, or even how I picture bodies in my head; for those I changed the values to less realistic aesthetically-pleasing values. I'm making a game not a real-life medical sim.
There's other software for this
- MB-Lab is more advanced but with more restrictive licensing (so it was discarded)
- VRoid Studio with Japanese anime characters
- Metahuman creator for realistic characters which can be freely used with the Unreal Engine (and therefore discarded)
- ...and probably more I don't know about
I could also have tweaked a pre-made free or paid model, or even just make a new model, but this should be done by someone with a stronger foundation on designing characters.
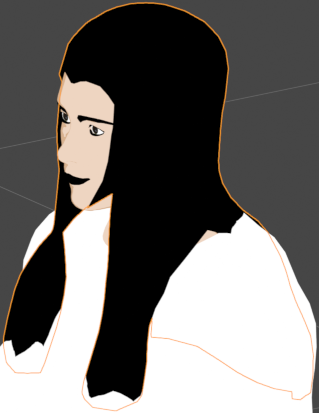
Hair modeling
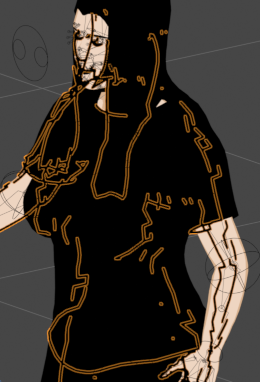
I am not aiming at realistic hair, so I modified the shape and colors. Multiple learning sources say that it's hard to be efficient at creating toon hair because the methods to easily make the required 3D shapes fail when outlines, cel-shading or non-realistic texturing are applied, as materials don't look as intended and UV coords are hard to visualize. This leads artists to finish by shaping one big mesh with a lots of small incremental tweaks vertex by vertex, then unwrapping UVs face by face. Because I don't hate myself, I compromised with flexible workflow with a limited amount of steps, and minimal tweaking at the end. It's not streamlined, but not too complex either.
The first big takeaway came from real-life cosmetology: split hair by areas. Cosmetologists typically split hair in 7 sections, but they want to grab hair with their hands, and I want to build a 3D mesh. Most sources split hair in front, sides and back, which is enough in most cases, but since I'm prototyping I just did front and back, with the sides resulting from merging those areas.
Wearables modeling
My first attempt at clothing was using Blender's Cloth Modifier. Even if it's not an animation, this method requires to simulate physics for a few seconds, then stop and keep the deformations. Turns out that mathematical cloth simulation has many shortcomings due to being an approximation of something that requires precision, therefore it's reserved for improving wrinkles. Even though I managed to avoid jitter after dozens of tries, I noped the hell away from that timesink that I don't really need.
Second try was modifying MakeHuman's assets, however I didn't spend time on it since I wasn't confident they would animate well. I now think that if you have premade assets meant for your base mesh, tweaking them is the best approach to adding clothes. You'll have to do even more tweaking of vertices and weight paint with whatever you create anyway.
Regardless, I ended duplicating part of the body mesh and editing it in order to know exactly how the clothes work. The shoes were the only part I felt I'd get a good result from premade assets.
Graphical style
It seems weird to work on 'style' after shaping the meshes, but some issues showed only as a consequence of the shapes.
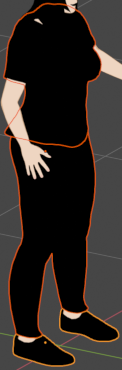
The black color for everything but skin, irises and genitals was chosen to be hide mistakes on the first model. Choosing forgiving parameters for the initial stages was a great idea. Most tweaks were due to mesh overlaps, and this avoided having to tweak even more for now.
I'll also point out that after I was packaging the game I noticed I forgot to add hair shine. I'll just add it in the next release.
Next, since I'm going for a toon style, considering an outline seems natural. I tried multiple methods.
First try that seemed to work was the 'inverted hull' method. It works with a slightly bigger mesh duplicate with the outline color, but only showing what is not facing the camera. Most of the part to be drawn is covered by the original, leaving a protruding edge. Main downside is there are more vertices and materials to process, and may need tweaking for skin-tight clothing. Inverted hull outlines can protrude through clothes when viewed at some angles, even if the clothes have their own outline. Usually a vertex group of the covered body is made made and hidden, but this doesn't work for the translucent wearables I'm using. You can instead be very exact with the size of the outlines and the distance of the cloth from the body cloth distance from the body (which can be set through physics calculations), but it gets complicated fast. A big advantage of outlines by inverted hulls is that it can be implemented in a game engine without shaders, but I'm not rendering 3D in-game so it's irrelevant.
I also tried generating 3D mesh lines using edge-detection when viewed through the camera (Blender's version is named Line Art). It lets you customize the lines more than an inverted hull, but looks weird while modelling and can build lines in places you don't want more often than an inverted hull. In general, dynamically generating an outline has fewer downsides than an inverted hull.
Another option are rasterizing outlines as 2D post-processing (Freestyle in Blender). It's visually similar to building lines, but they are not shown while modelling, opposite to the above, some people don't like them because of that. Also, edge-detection after 3D rendering is the fastest method. This video compares render times, showing it is ~5 times faster than generating 3D meshes for lines. However, according to Blender's documentation a limitation is memory usage.
After all this, I tried simply using a material as an outline. I left it for last due to incorrectly assuming it would lead to the uncanny valley. With 2D art, it's easier to draw lines than to shade but shading best demonstrates depth, even if used as a fake outline. To get an outline-like material use fresnel equations. For visual artists, a 'fresnel effect' just means light you see reflected changes depending on your viewing angle, so colors are different depending on curvature. This invites the uncanny valley in static images, but material-based outlines are beautiful when animated. The big downside is giving up control. You can change the overall thickness, but the relative thickness of each part is given by the faces' angle and the outline is always drawn on the mesh.
You can also create a texture and paint the outlines. The downside is that the outlines are not actually 3D, so when you rotate the mesh they will rotate with it. I didn't spend time on it.
In practice, people often combine these methods, often inverted hull + cel-shading + textures with different tones. I'm going for a simple aesthetic, so I'm just going to use fresnel cel-shading for now. I found it more pleasing than the other methods as it is the one that best shows the shape of the mesh, and it fits the style of the world, where drawables don't have outlines either (the main character does have an outline, but I'm planning to change it for consistency), and as a bonus it's one of the less complex methods to set up. In the future I may add an inverted hull with the same color as the shading just to give the outline a minimum thickness.
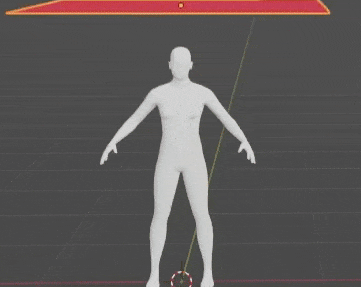
Rigging and skinning
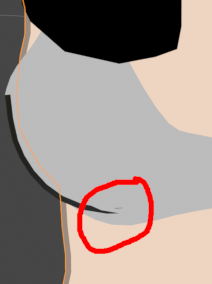
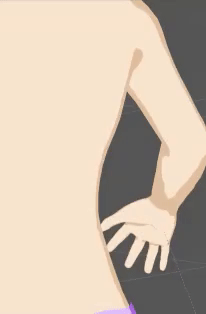
I went through quite a bit of effort to get approximately accurate automagic rigging and weight painting on the body. Some protrusions remain when bending and manual weight paint retouching is needed. Retouching will sometimes mess up other movements, and this usually means there are no edges in the mesh geometry that are perpendicular enough in the bending zone, so retopo is in order. The third option is using control bones to reduce the influence of bones that are causing too much bending, but I didn't have a need for that. This (5 minute!) video for an older version of Blender is the best resource I got on weight painting. Either way, you should always expect the need of some manual retouching to weight paint.
Another option is transferring weights from the body, but that will also require retouching and results may be similar to automatic weight painting. However, even if it did not need retouching, you don't want clothes to deform like skin. For example, look at your naked shoulder, and lift your arm high; you don't want that crease even with skin-tight clothing.
Yet another method is to copy vertex transforms from close vertices of another mesh (Blender does it with the Surface Deform Modifier). I experimented with two subdivided planes, noticed it can be finicky (normals sometimes flip and later transformations sometimes affect previous transformations), so I went back to weight painting.
Weight painting works well enough, but it's a separate skill to be learnt, because it's more like sculpting (ZBrush style) than painting. Also, you need to learn to configure the tool so it behaves predictably, for example, instead of replacing the weights, consider adding or substracting paint in small amounts. Enable auto-normalize by default, learn what that means, but be aware that if you have a single bone influencing a vertex the weight will be stuck at 1.
Finally, weight painting requires quality control. Check the entire range of motion of each joint from multiple angles, specially the extreme ones that only let you see the bending area while the rest of the mesh is covered by whatever you have in the scene.
Ugly protrusions during animations are so well known that I don't feel imagery is needed.
Animation
Whew! I'm almost done!
There's also a lot of software for animating:
- Animaze allows realtime facial expression motion tracking and mapping to a 3D model
- Live2D Cubism has pseudo-3D animations from a 2D character image, again with face tracking
- Cascadeur is a 3D character animator with a free tier
- Daz 3D is a 3D character animator that's easy to use with pre-made models for sale
- Poser is an easy to use 3D character animator but you buy the program and can buy pre-made model sets
- Adobe Fuse CC is a discountinued 3D character animator
- Mixamo is an online animating service with many predefined animations
- ...and probably many more
Overwhelmed with the options, I decided to stick to Blender for now. I feel animation is the most technical, repetitive and time-consuming part of the workflow, if only because you have to deal with the mistakes from previous stages too. So save time, and like everything in 3D, reuse and mirror along the X-axis when there's symmetry from the start.
Everything in this post above this line is licensed to the public under the CC-BY-SA 4.0 License.

Leave a comment
Log in with itch.io to leave a comment.